This post contains affiliate links. Click to see full details of my Privacy Policy.
Crochet a beautiful bee blanket with this free pattern by guest designer Emma of Stitched Up By Emma. You may recognise Emma from previous blog posts with her generous amounts of beautiful free patterns like the linked hearts blanket. Well she’s been working away on another beautiful design for you all.
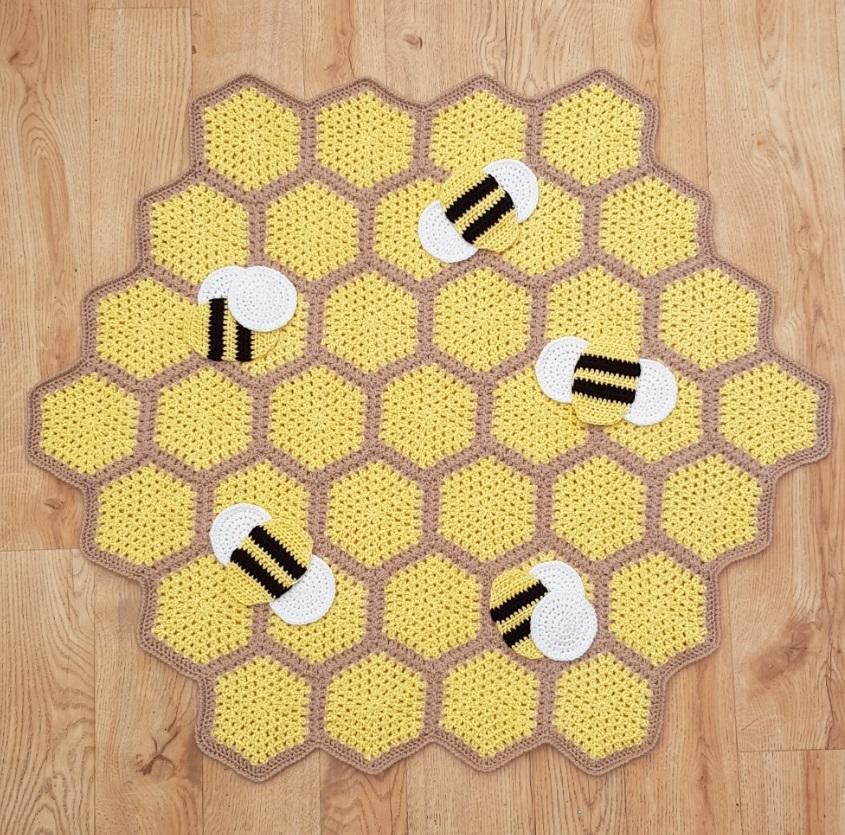
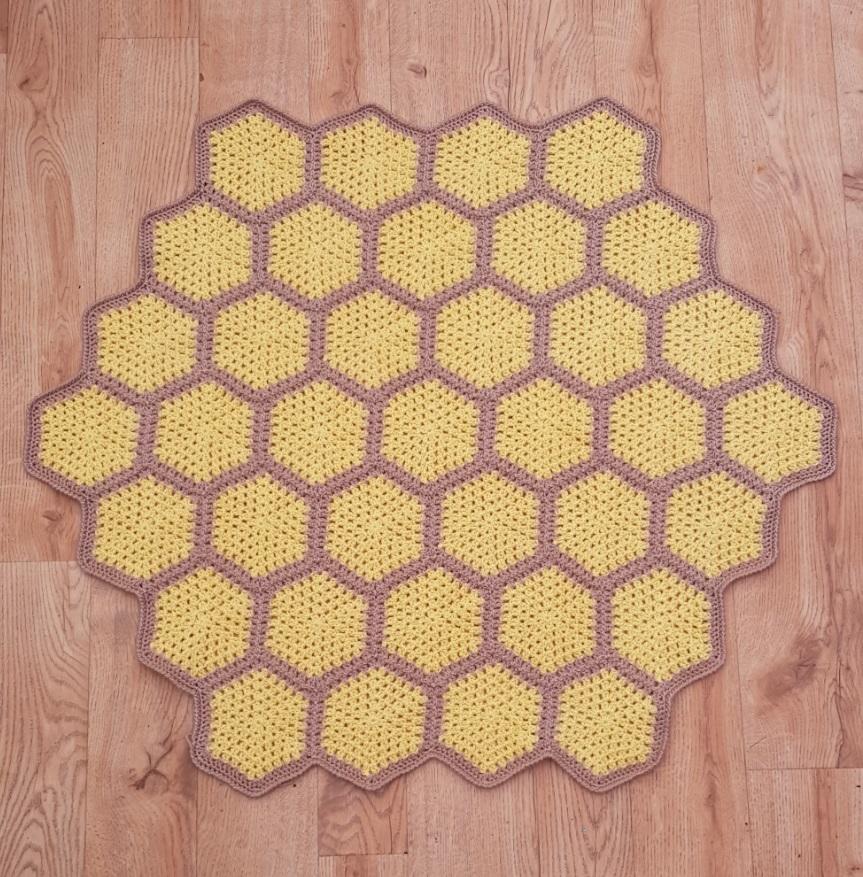
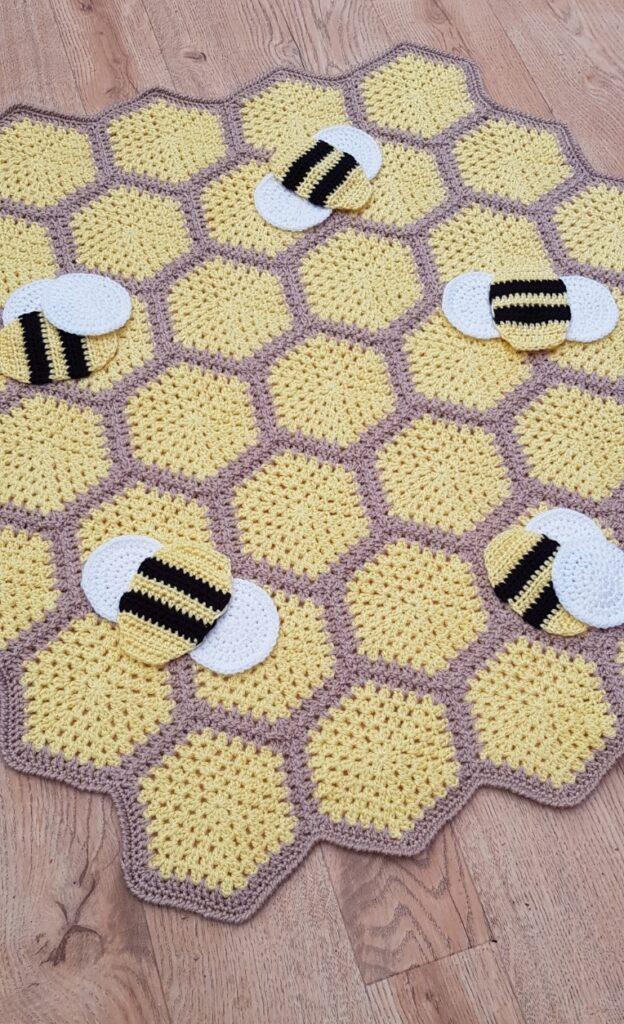
Buzzing with warmth and sweetness, this handmade crochet bee blanket is the perfect addition to any cozy corner. This design creates a honeycomb shape blanket with cute appliqué crochet bee’s attached separately to create a beautiful texture and slight 3D effect.
As this is a guest post, Bella Coco Crochet is unable to answer any queries. If you have a question, please contact the designer directly and they will be happy to help you.
MATERIALS & TOOLS NEEDED
- Yarn: This blanket uses baby DK. The original is made in: 200g of Deramores Studio Baby Soft DK in Primrose (Colour A), 100g of Deramores Studio Baby Soft DK in Sand (Colour B), 40g of Deramores Studio DK in Frost and 20g of Deramores Studio DK in Ebony.
- Alternative yarn suggestion: Paintbox Baby DK or Stylecraft Special DK.
- Hook: 3.5mm
- Scissors
- Darning needle
- White thread
GAUGE and size
Finished crochet bee blanket is approximately 33 inches across the widest point, 5 rounds of Treble crochet, from edge to edge is 4 inches.
PATTERN NOTES
Written in UK terms.
This crochet bee blanket pattern is made from individual hexagons crocheted together with a continuous join which makes up the last round of the hexagon. If you choose to use a different joining method such as sewing them together, you will need to crochet an extra round of the hexagon (instructions included further down) before joining.
You are able to amend the size of the crochet bee blanket by making more or less hexagons. The blanket has bee appliqués that are sewn on at the end so you can add as many as you like and arrange them as you wish or use the image below for reference when it comes to attaching them.
PIN FOR LATER
CROCHET TERMS
Slip Stitch(s): ss(s): Insert hook, yarn over pull through stitch and loop on hook
Chain (ch): Yarn over, pull through one loop on hook.
Chain space (Ch-sp): The space found between two stitches or in foundation chain
Double Crochet (dc): Insert into stitch, yarn over, pull up a loop, you will have two loops on the hook. Yarn over, pull through two loops.
Treble Crochet (tr): Yarn over, insert into stitch, yarn over, pull up a loop, you will have three loops on the hook. Yarn over, pull through two loops, yarn over, pull through remaining two loops.
Half Treble Crochet (htr): Yarn over and insert your hook into the chain or stitch, yarn over and pull through (you will have three loops on the hook) yarn over and pull through all three loops on the hook.
Half Treble Crochet 2 Together (htrc2tog): Leaving last loop of each htrc on hook, work 2 htrc in same space or stitch, yarn over and draw through all loops.
Sk: Skip
Inc: Increase
Rep: Repeat
Rnd: Round
Sp: Space
St(s): Stitches
[…] – repeat pattern stated number of times
*…* repeat pattern stated number of times.
(…) – instructions to be worked into the same stitch or space
Unsure of the differences between UK and US terms? Need a refresher on how to do your stitches? In my ‘How to crochet: A handy reference guide’ EBook I help you with all of these terms and you can always have them to hand! You will also get exclusive access to free video instructions. Learn more about the eBook here.
crochet bee blanket pattern
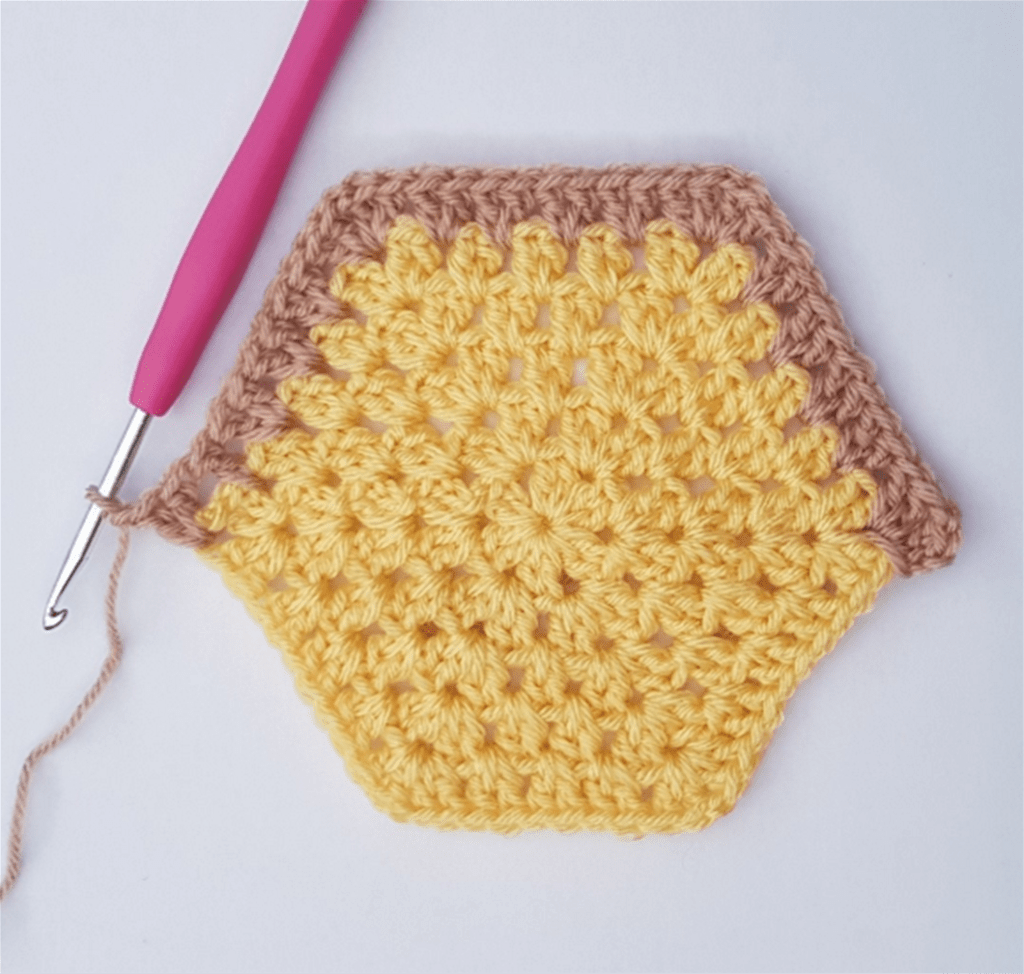
Hexagons – Make 37
With Colour A start with a magic ring (alternatively you can CH4 and join to the first CH with a SLST).
Rnd 1: CH2 (counts as the first st here and through out the hexagon), working into the magic ring, TR, *CH1, 2 TR* rep 5 times, join to the top of the CH2 with a SLST. SLST into the next st and again into the CHSP.
Rnd 2: CH2, (TR, CH1, 2 TR) into the CHSP, *(2 TR, CH1, 2 TR) in the next CHSP* rep 5 times, join to the top of the CH2 with a SLST. SLST into the next st and again into the CHSP.
Rnd 3: CH2, (TR, CH1, 2 TR) into the CHSP, 2 TR in the SP between the clusters from previous row, *(2TR, CH1, 2 TR) in the CHSP, 2 TR in the next SP * rep 5 times, join to the top of the CH2 with a SLST. SLST into the next st and again into the CHSP.
Rnd 4: CH2, (TR, CH1, 2 TR) into the CHSP, [2 TR in the next space] twice, *(2 TR, CH1, 2 TR) in the CHSP, [2 TR in the next SP] twice* rep 5 times, join to the top of the CH2 with a SLST. SLST into the next st and again into the CHSP.
Rnd 5: CH2, (TR, CH1, 2 TR) into the CHSP, [2 TR in the next space] 3 times, *(2 TR, CH1, 2 TR) in the CHSP, [2 TR in the next SP] 3 times* rep 5 times, join to the top of the CH2 with a SLST. SLST into the next st and again into the CHSP. Fasten off
If you are joining your hexagons with a continuous join do not work the next rnd.
OR if you wish to sew your hexagons together:
Attach colour B to any corner CHSP.
Rnd 6: CH2, (TR, CH1, 2 TR) into the CHSP, [2 TR in the next space] 4 times, *(2 TR, CH1, 2 TR) in the CHSP, [2 TR in the next SP] 4 times* rep 5 times, join to the top of the CH2 with a SLST. SLST into the next st and again into the CHSP. Fasten off
Weave in your ends.
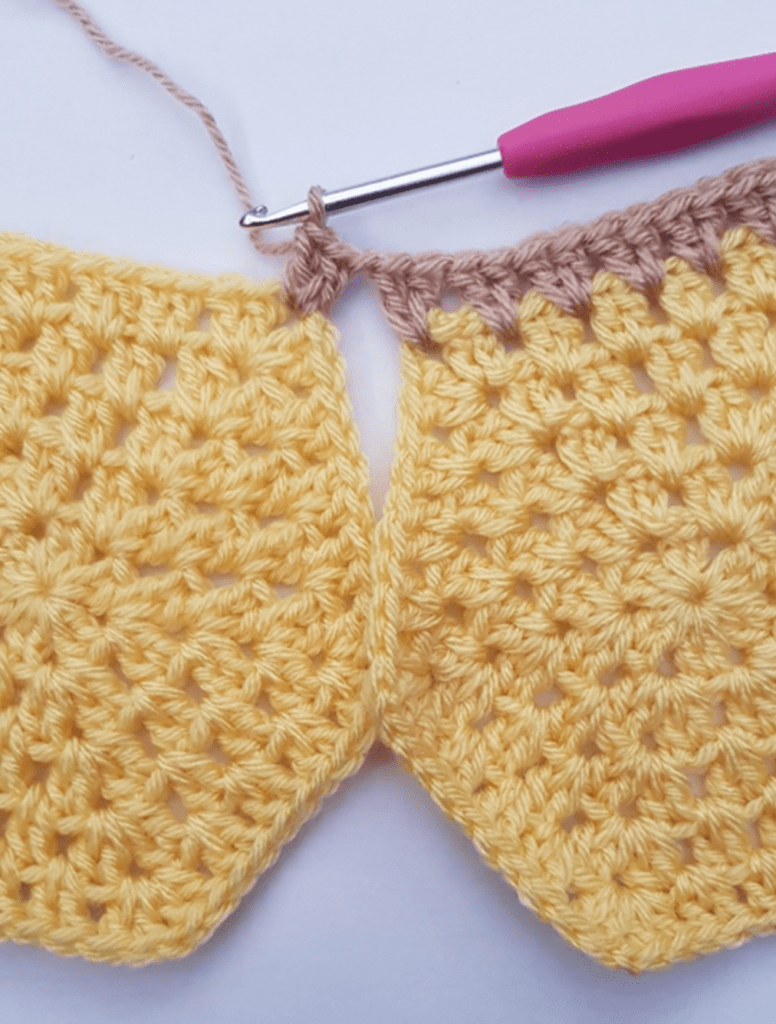
Joining
1) Take your first hexagon and attach colour B to any corner CHSP.
2) CH2, (TR, CH1, 2 TR) into the CHSP, [2 TR in the next space] 4 times, *(2 TR, CH1, 2 TR) in the CHSP, [2 TR in the next SP] 4 times* rep twice.
You will have worked along 3 sides of your hexagon.
3) 2 TR into the CHSP, CH1.
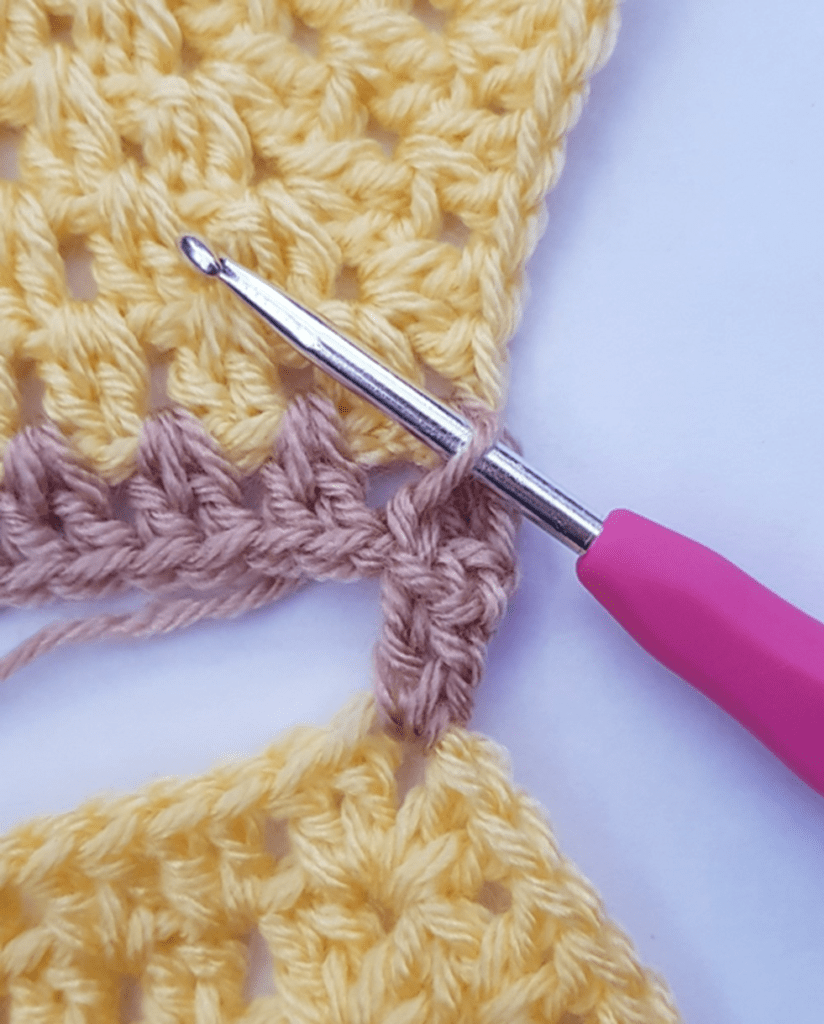
4) Take your next hexagon and 2 TR in any CHSP.
5) SLST in the SP between the clusters, next to the CHSP on your first hexagon.
6) 2 TR in the next SP on your second hexagon. Followed by SLST in the next SP on your first hexagon.
7) Continue this until you reach your corner CHSP. Work *(2 TR, CH1, 2 TR) in the CHSP, [2 TR in the next SP] 4 times* rep 3 times.
8) 2 TR into the CHSP, CH1.
9) Rep steps 4 – 8 twice more.
You should now have 4 hexagons joined.

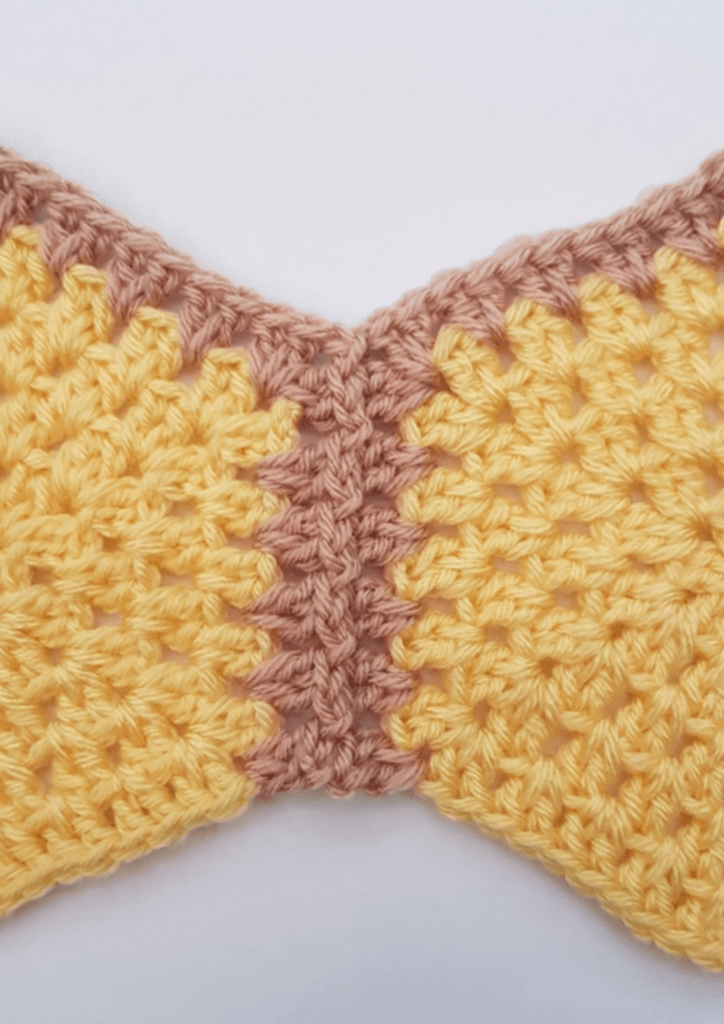
10) Continue working around your last hexagon working 2 TR in each SP and 2 TR, CH1, 2 TR in each corner CHSP on all the sides until you reach the last corner CHSP that already has 2 TR in it from when you attached the hexagon.
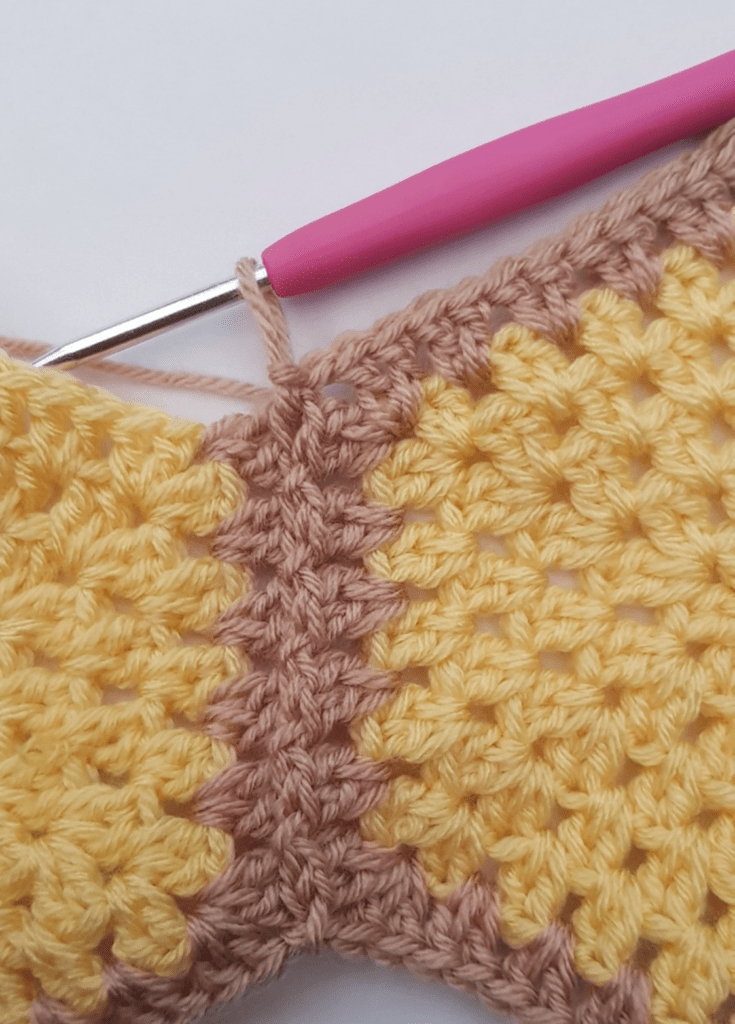
11) Work 2 TR into the last CHSP, SLST into the CH1 SP from attaching the hexagons, CH1, then 2 TR in the corner CHSP in the next hexagon.
12) Continue working like this along the bottom of the hexagons until you reach the end.
The first hexagon will have 1 side that has not been worked yet, all the other hexagons will have a full rnd of colour B.
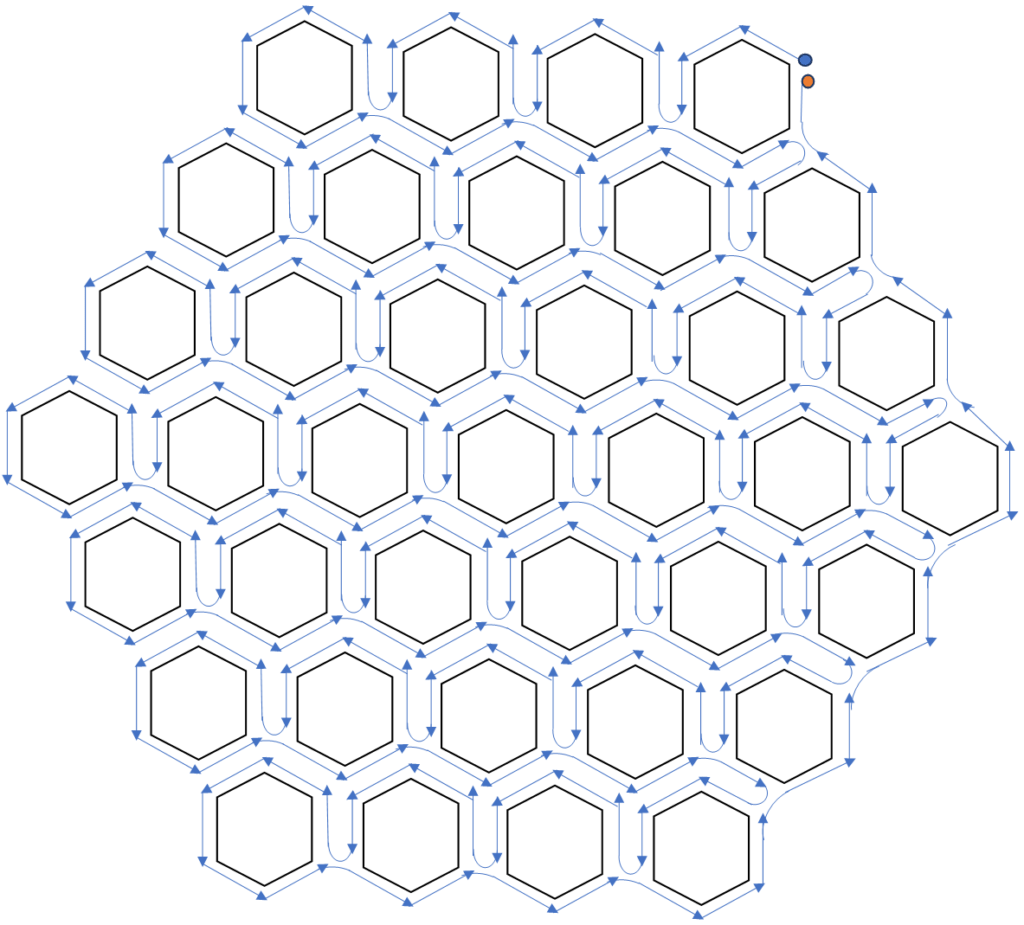
13) Carry on adding hexagons in the same manner as the first row following the path outline on the next page.
14) When working the second row and you come to a corner work your SLST into the CHSP made by the CH1.


Start at the blue dot and follow the line to join ending at the red dot.
Border
Rnd 1: CH1 (does not count as st here and through out) DC in every st all the way around the blanket, join with a SLST to the first st.
Rnd 2: CH1, work a DC into the st on the right and continue working clockwise instead of counter clockwise, This is know as the crab stitch or reverse double crochet stitch. Continue all the way around your blanket.
Fasten off and weave in your ends.
Bee Applique

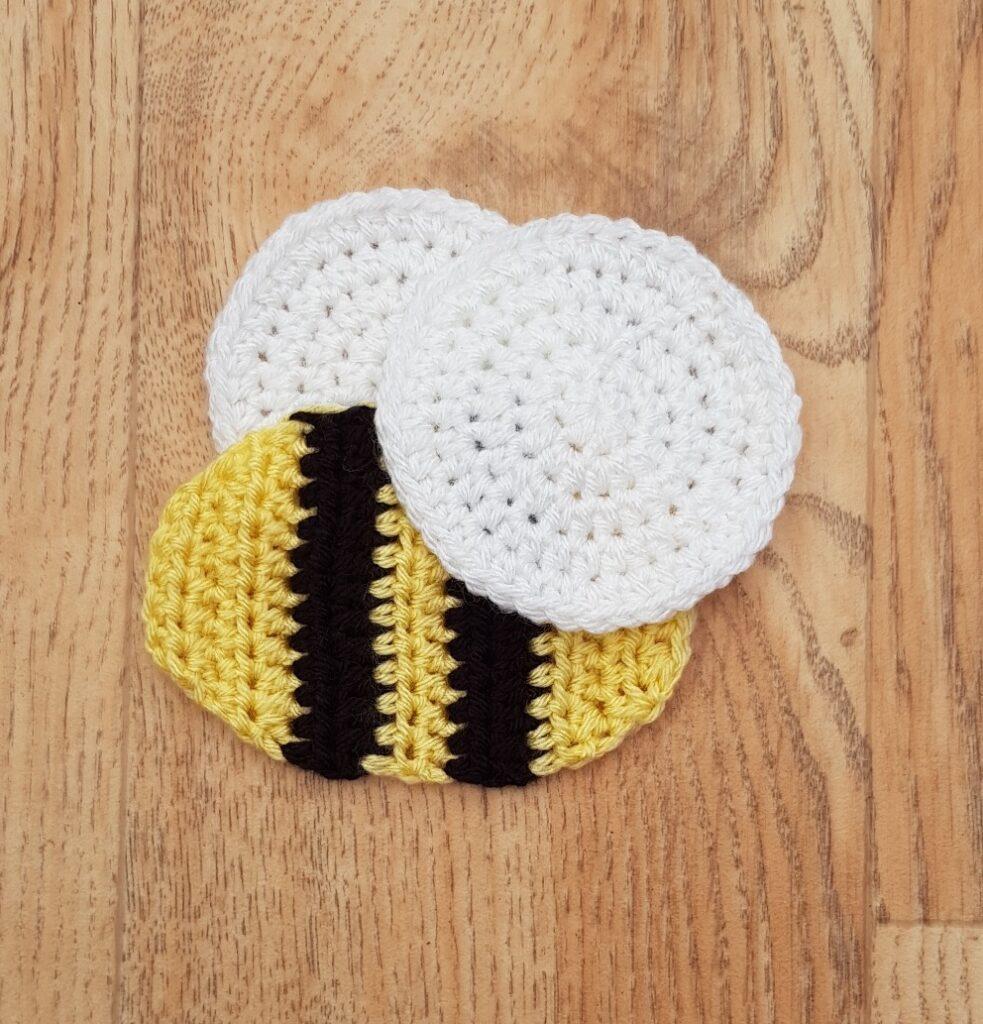
Body – make 5
With Primrose:
Row 1: CH7, HTR into the 2nd CH from the hook and in each CH (6)
Row 2: CH1 (does not count as a st from here and throughout the body) 2 HTR into the first st, HTR in each st, 2 HTR in the last st and turn. (8)
Row 3: CH1 (does not count as a st from here and throughout the body) 2 HTR into the first st, HTR in each st, 2 HTR in the last st and turn. (10)
Row 4: CH1 (does not count as a st from here and throughout the body) 2 HTR into the first st, HTR in each st, 2 HTR in the last st and turn. (12)
Change to Black
Row 5 – 6: CH1, HTR in every st and turn. (12)
Change to Yellow
Row 7 – 8: CH1, HTR in every st and turn. (12)
Change to Black
Row 9 – 10: CH1, HTR in every st and turn. (12)
Change to Yellow
Row 11: CH1, HTR in every st and turn. (12)
Row 12: HTR2tog, HTR in each st to the last 2 sts, HTR2tog and turn (10)
Row 13: HTR2tog, HTR in each st to the last 2 sts, HTR2tog and turn (8)
Row 14: HTR2tog, HTR in each st to the last 2 sts, HTR2tog and turn (6)
Fasten off and weave in your ends.
Wings – Make 10:
With Frost make a magic ring.
Rnd 1: CH1 (does not count as a st here and through out), working into the magic ring, work 8 HTR, join with a SLST to the first st. (8)
Rnd 2: CH1, work 2 HTR into every st, join with a SLST to the first st. (16)
Rnd 3: CH1, *Inc in the next st, HTR in the next* rep 8 times, join with a SLST to the first st. (24)
Rnd 4: CH1, *Inc in the next st, HTR in the next 2 sts* rep 8 times, join with a SLST to the first st. (32)
Rnd 5: CH1, *Inc in the next st, HTR in the next 3 sts* rep 8 times, join with a SLST to the first st. (40)
Fasten off and weave in your ends.
Arrange you bees how you would like them to be. Below is an example. Sew them to the crochet bee blanket.
designer Emma
Hi! My name is Emma and I am the designer and maker behind Stitched Up By Emma. I live in a small village in Derbyshire with my family. I have tried so many different crafts from quilling, cross stitch, quilting, polymer clay work, jewellery making, 3D beading and drawing, you name it, I’ve probably tried it. Out of all of them crochet stole my heart.
I was taught to knit and crochet by my Nan when I was about 12. I took to knitting but it wasn’t until about 5 years ago that I really found my love for crochet and since then I have become obsessed. I decided to jump straight in the deep end and Tunisian crocheted a Pokémon blanket for my son who I was pregnant with at the time. It was massive. It took me 9 months to make! I then thought that I would try designing my own patterns and this was how Stitched Up By Emma was born. I started to design and crochet baby comforters, then a few hats. I then started pattern testing for other designers and I have now moved onto designing my own blankets.
If you make this blanket I would love to see your creations and versions of the Busy Bumble Blanket. You can find and tag me on Instagram @stitchedupbyemma or Facebook: www.facebook.com/stitchedupbyemma and use the hash tags #busybumbleblanket and #stitchedupbyemma. I cant wait to see them.
This crochet bee blanket pattern has been tested and should not contain any mistakes. however the designer is more than happy to help should you find any problems.
You can contact me by email: stitchedupbyemma@hotmail.com


6 Comments
Trish
May 24, 2021 at 8:23 pmThis blanket is sooo CUTE! It’s also gender neutral so it can be stitched up and have it ready when a new baby arrives.
I was so excited yesterday when I heard the first bee of the season here and now I found this beautiful bee blanket. It must be a sign, I must make this blanket! Thank you for sharing your pattern.
Susan Richardson
June 30, 2021 at 1:19 pmI love the look of this blanket as I am a beekeeper. I have not made anything in “squares” or in this case hexagons so the joining looks a bit daunting , but your instructions look very thorough. I will need to get the yarn first. Thank you!
BellaCocoTeam
July 1, 2021 at 9:51 amYou are welcome 🙂
Bumble Bee Throw Blanket- Such A Bee-autiful Throw! - Knit And Crochet Daily
August 3, 2021 at 10:07 pm[…] free crochet bumble bee blanket pattern with a cozy texture is fun and cute. Busy Bumble Blanket by Emma Moss has a bright design and is perfect for a baby or toddler. Made from individual […]
Katie
April 19, 2023 at 9:58 pmDo you have a picture of how you sew on the bees? Do you sew all around them or just a few stitches to attach them?
BellaCocoTeam
April 20, 2023 at 1:47 pmHi Kate As this was a guest post you will have to contact the designer directly 🙂