This post contains affiliate links. If you make a purchase through links on our site, I may earn a small commission. Click to see full details of my Privacy Policy.
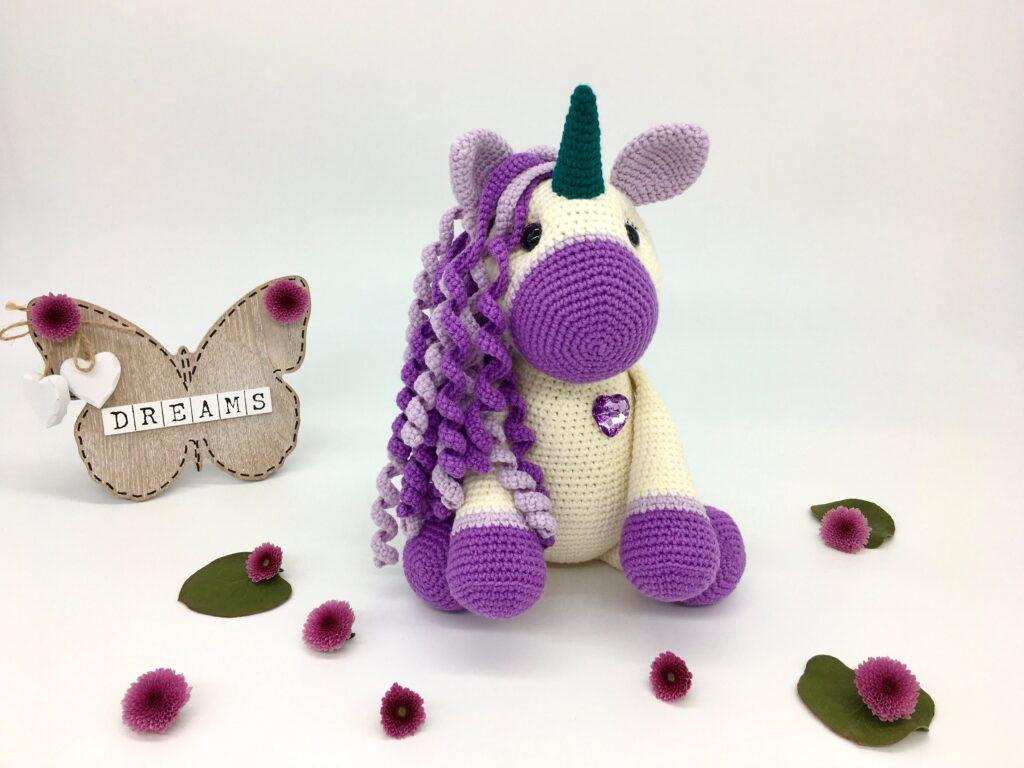
In this post, you will find everything you need to crochet this adorable amigurumi unicorn. Violet the Unicorn has been designed for the blog by guest designer Petra of Cuddly Stitches Craft. Please contact the designer Petra, directly if you have any questions about the pattern.


Please note: If you’re gifting this amigurumi unicorn to a child, please ensure you have created a safe and secure toy. I like to use embroidered eyes or safety eyes. If you’d like more information on how to make child-safe toys, this blog, Tips on Making Amigurumi Safe For Children by Yarnhild is full of useful info!

Materials & Tools
- Yarn: Sportweight yarn in cream (320m), dark purple (160m), light purple (160m) and teal (160m). I can recommend: Debbie Bliss Baby Cashmerino
- Hook: 3mm
- Scissors
- Darning needle
- Stitch markers
Additonal Materials needed for Amigurumi
You might want to purchase these items in multi-packs if you love making amigurumi:
- Black embroidery thread
- Fiberfill for stuffing
- Pins with large heads
- 12mm safety eyes
- Heart-shaped button for decoration (optional)

Disclaimer
Disclaimer: If you intend to sell your finished amigurumi unicorn toy, as the maker of these items, you are responsible for marketing a safe toy. Please make sure they comply with the legal requirements of the respective country in which the toy is going to be sold.
Pattern Notes
- Written in US terms: CLICK HERE for my free conversion chart
- Skill level: intermediate
Finished Size
- Seated: 24.5cm (9.5 inches)
- Tip of the horn to the toes: 32cm (12.6 inches)
What is Amigurumi?
Amigurumi is a Japanese art form of creating small crocheted or knitted stuffed toys, dolls or figurines. The word “amigurumi” comes from the Japanese words “ami”, meaning crocheted or knitted, and “nuigurumi”, meaning stuffed doll.
To get started, you’ll need some basic crochet supplies, including a crochet hook, yarn, and stuffing. You will need some basic crochet skills, including making a magic ring, double crochet, and increasing and decreasing stitches as these techniques are found in most amigurumi patterns.

Pin for Later
Terms & Abbreviations
- MR: Magic Ring/Circle
- Chain(s): ch(s):Yarn over, pull through
- Slip Stitch (ss): Insert hook, yarn over, pull through all loops.
- Single Crochet(s): sc(s): Insert hook into stitch, yarn over, pull up a loop, you will have two loops on the hook. Yarn over, pull through remaining two loops.
- Half Double Crochet (hdc): Yarn over and insert your hook into the chain or stitch, yarn over and pull through (you will have three loops on the hook) yarn over and pull through all three loops on the hook
- Double Crochet (dc): Yarn over, insert into chain space, yarn over, pull through, you will have three loops on the hook. Yarn over, pull through two loops, yarn over, pull through remaining two loops.
Advanced Tecnhiqnues
- Increase (inc): two single crochet stitches in the same stitch
- Invisible Decrease (inv): insert the hook into the front loop of the first stitch (two loops on hook) and immediately insert it again into the front loop of the next stitch (three loops on the hook). Yarn over and draw through the first two loops on the hook (two loops on the hook). Yarn over and draw through the two loops on the hook to finish your invisible decrease
- Back Loops Only (BLO)
- Fasten Off (FO)
- (…..) x 6: repeat the pattern inside the brackets by the given number (in this example, repeat the pattern in the brackets 6 times)
- {…}: number shown inside these brackets equals the number of total stitches at the end of each round
Unsure of the differences between UK and US terms? Need a refresher on how to do your stitches? In my ‘How to crochet: A handy reference guide’ EBook I help you with all of these terms and you can always have them to hand! You will also get exclusive access to free video instructions. Learn more about the eBook here.
About The Designer
Hi, my name is Petra and I’m the face behind Cuddly Stitches Craft! I am passionate about anything crochet. I love designing crochet toys!
How did you learn to crochet?
My mum introduced me to handmade crafts, she is super talented and can simply create anything you can think of! I fondly remember spending time with her as a little girl learning to knit and embroider. It wasn’t until later in life that I found my passion for crochet and my love for crocheting toys.
What was the first thing you crocheted?
The first item I crocheted was a Christmas snowflake, followed by a few gifts I crocheted for my lovely daughter Natalka. I remember that wonderful feeling when I finished my first ever Amigurumi toy. I’d made it for my daughter Natalka and she was excited to receive it because I had made it especially for her.
You can explore more of Petra’s beautiful designs here: Cuddly Stitches Craft.

FREE Pattern: Amigurumi Unicorn
Ears
- Crochet from the top of the ear downwards.
- R1: MR – 6 x SC into the ring {6}
- R2: (SC in next ST, INC) x 3 {9}
- R3: (SC in next 2 ST, INC) x 3 {12}
- R4: (SC in next 3 ST, INC) x 3 {15}
- R5: (SC in next 4 ST, INC) x 3 {18}
- R6: (SC in next 5 ST, INC) x 3 {21}
- R7-R10 (4 rounds): SC in each ST around {21}
- R11: (SC in next 5 ST, INV DEC) x 3 {18}
- R12: (SC in next 4 ST, INV DEC) x 3 {15}
- R13: (SC in next 3 ST, INV DEC) x 3 {12}
- R14: (SC in next 2 ST, INV DEC) x 3
- FO leaving a long piece of yarn for sewing {9}, do not stuff the ears.
Horn
- Crochet from the top of the horn downwards.
- R1: MR – 5 x SC into the ring {5}
- R2: SC in next 2 ST, INC, SC in next 2 ST {6}
- R3: (SC in next 2 ST, INC) x 2 {8}
- R4: SC in each ST around {8}
- R5: (SC in next 3 ST, INC) x 2 {10}
- R6: SC in each ST around {10}
- R7: (SC in next 4 ST, INC) x 2 {12}
- R8: SC in each ST around {12}
- R9: (SC in next 5 ST, INC) x 2 {14}
- R10: SC in each ST around {14}
- R11: (SC in next 6 ST, INC) x 2 {16}
- R12: SC in each ST around {16}
- FO leaving a long piece of yarn for sewing.
- Stuff the horn well.
Head
Round 1 – 17
- Start from the front to the back of the head.
- R1: MR – 6 x SC into the ring {6}
- R2: INC in each ST around {12}
- R3: (SC in next ST, INC) x 6 {18}
- R4: (SC in next 2 ST, INC) x 6 {24}
- R5: (SC in next 3 ST, INC) x 6 {30}
- R6: (SC in next 4 ST, INC) x 6 {36}
7-17
- R7: (SC in next 5 ST, INC) x 6 {42}
- R8: (SC in next 6 ST, INC) x 6 {48}
- R9-R12 (4 rounds): SC in each ST around {48} Change yarn to light purple colour.
- R13: SC in each ST around {48} Change yarn to cream colour.
- R14: SC in each ST around {48}
- R15: SC in next 9 ST, INC, (SC in next 5 ST, INC) x 5, SC in next 8 ST {54}
- R16: SC in next 10 ST, INC, (SC in next 6 ST, INC) x 5, SC in next 8 ST {60}
- R17: SC in next 11 ST, INC, (SC in next 7 ST, INC) x 5, SC in next 8 ST {66}
Round 18 – 30
- R18-R26 (9 rounds): SC in each ST around {66} – leave your stitch marker in at the start of R18 & R25 you will need to refer back to this when placing the eyes and crocheting the mane.
- R27: (SC in next 9 ST, INV DEC) x 6 {60}
- R28: (SC in next 8 ST, INV DEC) x 6 {54}
- R29: (SC in next 7 ST, INV DEC) x 6 {48}
- R30: (SC in next 6 ST, INV DEC) x 6 {42}
Eye Placement:
Top Tip: to help with placing the eyes on your amigurumi, I advise using pins with large heads to mark where the eyes will be placed. Once you are happy with the placement of the eyes you can then insert the safety eyes. The safety eyes usually make a large hole in between the stitches so it is not recommended to change the placement once they are in. For reference see (Pic H1).
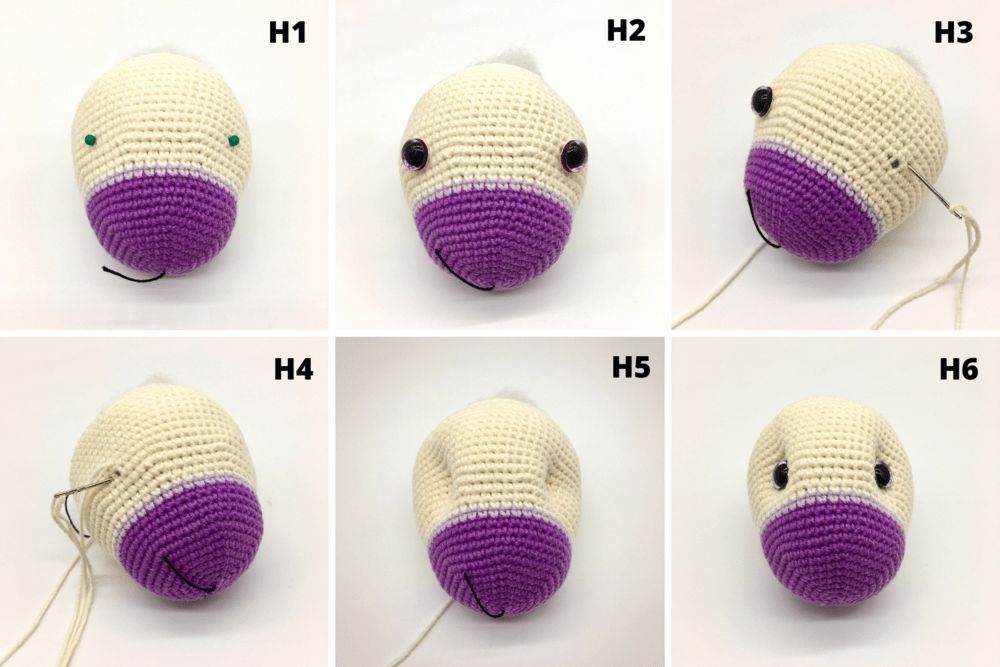
- Before you start you’ll need to stuff the unicorn’s head.
- The eyes pictured have been placed between rounds R18 and R19.
- First eye – count 25 stitches from your marker at the start of R18 and place the eye between ST25 and ST26.
- Second eye – count 43 stitches from your marker at the start of R18 and place the eye between ST43 and ST44.
- Insert the safety eyes but do not put the safety backs on yet (Pic H2).
Sculpting the eyes (indented eye look):
- Take a long piece of yarn and thread your needle.
- Remove the left eye; place the needle in a stitch next to the left eye hole (Pic H3).
- Now, remove the right eye; come across the side with the needle and place it into a stitch next to the right eye hole; pull all the way through till the yarn tail is not showing.
- Using your needle place another stitch next to the right eye and come across the side with the needle again (Pic H4).
Finishing Touches
- Repeat the process back and forth between the two eye holes while pulling on the yarn tightly each time you come across the side. You will need to repeat this about three times until you achieve the indented eye look you want and then you can weave the yarn end in (Pic H5).
- Place the eyes back in the holes; remove some or most of the stuffing and place the safety backs on making sure they snap in place tightly.
- Add more stuffing to the head (Pic H6) and continue crocheting R31.
Round 31-36
- R31: (SC in next 5 ST, INV DEC) x 6 {36}
- R32: (SC in next 4 ST, INV DEC) x 6 {30}
- R33: (SC in next 3 ST, INV DEC) x 6 {24}
- R34: (SC in next 2 ST, INV DEC) x 6 {18}
- R35: (SC in next ST, INV DEC) x 6 {12}
- R36: SC in each ST around {12}, close the hole using a yarn needle and weave the yarn end in.
Body
Round 1 – 10
- Start from the bottom of the amigurumi unicorn body to the top.
- R1: MR – 6 x SC into the ring {6}
- R2: INC in each ST around {12}
- R3: (SC in next ST, INC) x 6 {18}
- R4: (SC in next 2 ST, INC) x 6 {24}
- R5: (SC in next 3 ST, INC) x 6 {30}
- R6: (SC in next 4 ST, INC) x 6 {36}
- R7: (SC in next 5 ST, INC) x 6 {42}
- R8: (SC in next 6 ST, INC) x 6 {48}
- R9: SC in each ST around {48}
- R10: (SC in next 7 ST, INC) x 6 {54}
11 – 29
- R11: (SC in next 8 ST, INC) x 6 {60}
- R12: SC in each ST around {60}
- R13: (SC in next 9 ST, INC) x 6 {66}
- R14: SC in each ST around {66}
- R15: (SC in next 10 ST, INC) x 6 {72}
- R16-R20 (5 rounds): SC in each ST around {72}
- R21: (SC in next 10 ST, INV DEC) x 6 {66}
- R22-R23 (2 rounds): SC in each ST around {66}
- R24: (SC in next 9 ST, INV DEC) x 6 {60}
- R25-R26 (2 rounds): SC in each ST around {60}
- R27: (SC in next 8 ST, INV DEC) x 6 {54}
- R28-R29 (2 rounds): SC in each ST around {54} Start stuffing the body.
30 – 41
- R30: (SC in next 7 ST, INV DEC) x 6 {48}
- R31-R32 (2 rounds): SC in each ST around {48}
- R33: (SC in next 6 ST, INV DEC) x 6 {42}
- R34-R35 (2 rounds): SC in each ST around {42}
- R36: (SC in next 5 ST, INV DEC) x 6 {36}
- R37-R38 (2 rounds): SC in each ST around {36}
- R39: (SC in next 4 ST, INV DEC) x 6 {30}
- R40-R41 (2 rounds): SC in each ST around and FO leaving a long piece of yarn for sewing {30}
Arms
Round 1 – 16
- Starting from the bottom of the arm and working upwards.
- R1: Magic ring – 6 x SC into the ring {6}
- R2: INC in each ST around {12}
- R3: (SC in next ST, INC) x 6 {18}
- R4: (SC in next 2 ST, INC) x 6 {24}
- R5: (SC in next 3 ST, INC) x 6 {30}
- R6: (SC in next 4 ST, INC) x 6 {36}
- R7: SC in each ST around – BLO {36}
- R8-R9 (2 rounds): SC in each ST around {36}
- R10: (SC in next 4 ST, INV DEC) x 6 {30}
- R11-R12 (2 rounds): SC in each ST around {30} Change yarn to light purple colour.
- R13: SC in each ST around {30}
- R14: (SC in next 3 ST, INV DEC) x 6 {24} Change yarn to cream colour.
- R15-R16 (2 rounds): SC in each ST around {24} You can now start stuffing the arm.
17 – 27
- R17: (SC in next 6 ST, INV DEC) x 3 {21}
- R18-R19 (2 rounds): SC in each ST around {21}
- R20: (SC in next 5 ST, INV DEC) x 3 {18}
- R21-R24 (4 rounds): SC in each ST around {18}
- R25: INV DEC, SC in next 16 ST {17}
- R26-R27 (2 rounds): SC in each ST around {17} Stop stuffing the arm.
28 – 35
- R28: INV DEC, SC in next 15 ST {16}
- R29-R30 (2 rounds): SC in each ST around {16}
- R31: INV DEC, SC in next 14 ST {15}
- R32: SC in each ST around {15}
- R33: INV DEC, SC in next 13 ST {14}
- R34: SC in each ST around {14}
- R35: SC in next 4 ST and then SC the opening together to close the arm, FO leaving a long piece of yarn for sewing later in the pattern.
Legs
Round 1 – 12
- Start from the bottom of the leg upwards.
- R1: Magic ring – 6 x SC into the ring {6}
- R2: INC in each ST around {12}
- R3: (SC in next ST, INC) x 6 {18}
- R4: (SC in next 2 ST, INC) x 6 {24}
- R5: (SC in next 3 ST, INC) x 6 {30}
- R6: (SC in next 4 ST, INC) x 6 {36}
- R7: (SC in next 5 ST, INC) x 6 {42}
- R8: SC in each ST around – BLO {42}
- R9: SC in each ST around {42}
- R10: (SC in next 5 ST, INV DEC) x 6 {36}
- R11: SC in each ST around {36}
- R12: (SC in next 4 ST, INV DEC) x 6 {30} Start stuffing the leg.
13 – 24
- R13: SC in each ST around {30} Change yarn to light purple colour.
- R14: SC in each ST around {30}
- R15: (SC in next 8 ST, INV DEC) x 3 {27} Change yarn to cream colour.
- R16: SC in each ST around {27}
- R17: (SC in next 7 ST, INV DEC) x 3 {24}
- R18: SC in each ST around {24}
- R19: (SC in next 6 ST, INV DEC) x 3 {21}
- R20-R21 (2 rounds): SC in each ST around {21}
- R22: (SC in next 5 ST, INV DEC) x 3 {18}
- R23-R24 (2 rounds): SC in each ST around {18} Stop stuffing the leg.
25-28
- R25: INV DEC, SC in next 16 ST {17}
- R26-R27 (2 rounds): SC in each ST around {17}
- R28: SC the opening together to close the leg and FO leaving a long piece of yarn for sewing.

Mane
- For the mane, crochet two rows of 11 ringlets each; starting from the front of the head towards the back of the head.
- First row of 11 ringlets – light purple colour:
- Count 36 STs from the start of R25 of the head and insert the hook through in between ST36 and ST37; draw a loop (Pic M1) and start a chain.
- Chain 81 STs for the first ringlet (Pic M2), then 80xSC into the chain starting from 2nd CH from the hook.
- Then, insert your hook into the next stitch on the top of the head (Pic M3); draw a loop again and start to crochet another ringlet (Pic M4).
Continued: Crochet 11 ringlets in total as per the pattern below:
- First 4 ringlets – chain 81 STs and then 80xSC into the chain starting from 2nd CH from the hook.
- Another 3 ringlets – chain 91 STs and then 90xSC into the chain starting from 2nd CH from the hook.
- Last 4 ringlets – chain 101 STs and then 100xSC into the chain starting from 2nd CH from the hook.
- FO and weave both yarn ends in
- Second row of 11 ringlets – dark purple colour:
- Repeat Step 1 to Step 5 above but insert the hook through in between ST37 and ST38 in R25 in Step 1. If you would like your unicorn to have a very thick mane you can add another row of ringlets.
Tail
- Use the same method that you used for crocheting the mane. Crochet 3 rows of ringlets – 3 ringlets per row:
- First row of 3 ringlets – between R15 & R16 of the body – chain 71 STs and then 70xSC into the chain starting from 2nd CH from the hook.
- Second row of 3 ringlets – between R16 & R17 of the body – chain 61 STs and then 60xSC into the chain starting from 2nd CH from the hook.
- Third row of 3 ringlets – between R17 & R18 of the body – chain 56 STs and then 55xSC into the chain starting from 2nd CH from the hook.
- Finally, FO and weave all yarn ends in.

Assembly
Head and ears of the amigurumi unicorn:
- Before sewing you want to pin the ears to the head first to make sure they are symmetrical from the front, side and back. Sew the ears to the head. I placed the ears between R24 and R26.
Horn and head of the amigurumi unicorn:
- When attaching the horn, you want to pin the horn to the head and check that it is placed in the centre between the ears. I placed the horn between R16 and R23. Sew the horn to the head, adding more stuffing if needed.
Body and head of the amigurumi unicorn:
- Check the body and the head are in the centre by pinning it in place, when you are happy with the placement sew the body to the head. If needed add more stuffing to the head before securing fully.
Arms of the amigurumi unicorn:
- Start by pinning the arms to the body, forward-facing at an angle of about 45° making sure both arms are symmetrical from the front and back. Check you are happy with the placement and then you can sew the arms to the body. I placed the arms between R31 and R37 of the body.
Legs of the amigurumi unicorn:
- Turn the body upside down with the nose facing away from you. Pin the legs to the body as shown in the photo below making sure they look symmetrical. When you are happy with the placement of the legs, make sure you can sit your toy up. You can adjust the placement of the legs if needed. Sew the legs to the body. I placed the legs between R3 and R9 of the body.
Eye lash embroidery:
- Embroider the eyelashes using embroidery thread or thin black yarn as an alternative.

Free Amigurumi Patterns
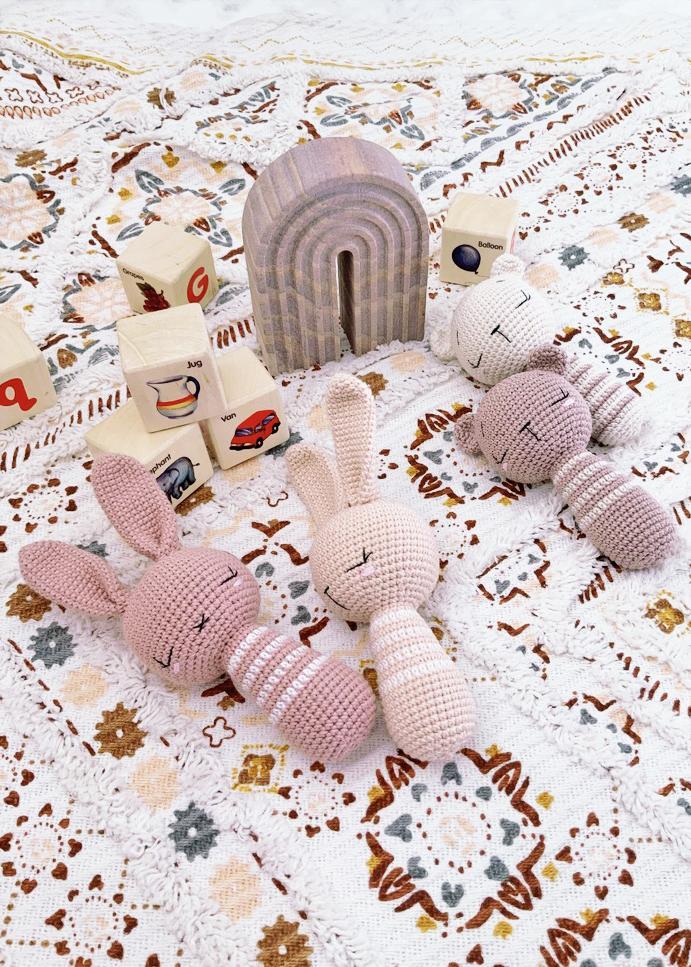
Love amigurumi? There are more cute and cuddly amigurumi patterns available on the blog for you to try, I’ll leave some suggestions below or CLICK HERE to explore all of the patterns by our talented guest designers. See below for some patterns that I have selected:
- Sleepy Baby Bear and Bunny Stick by Alanna from Theodore & Rose
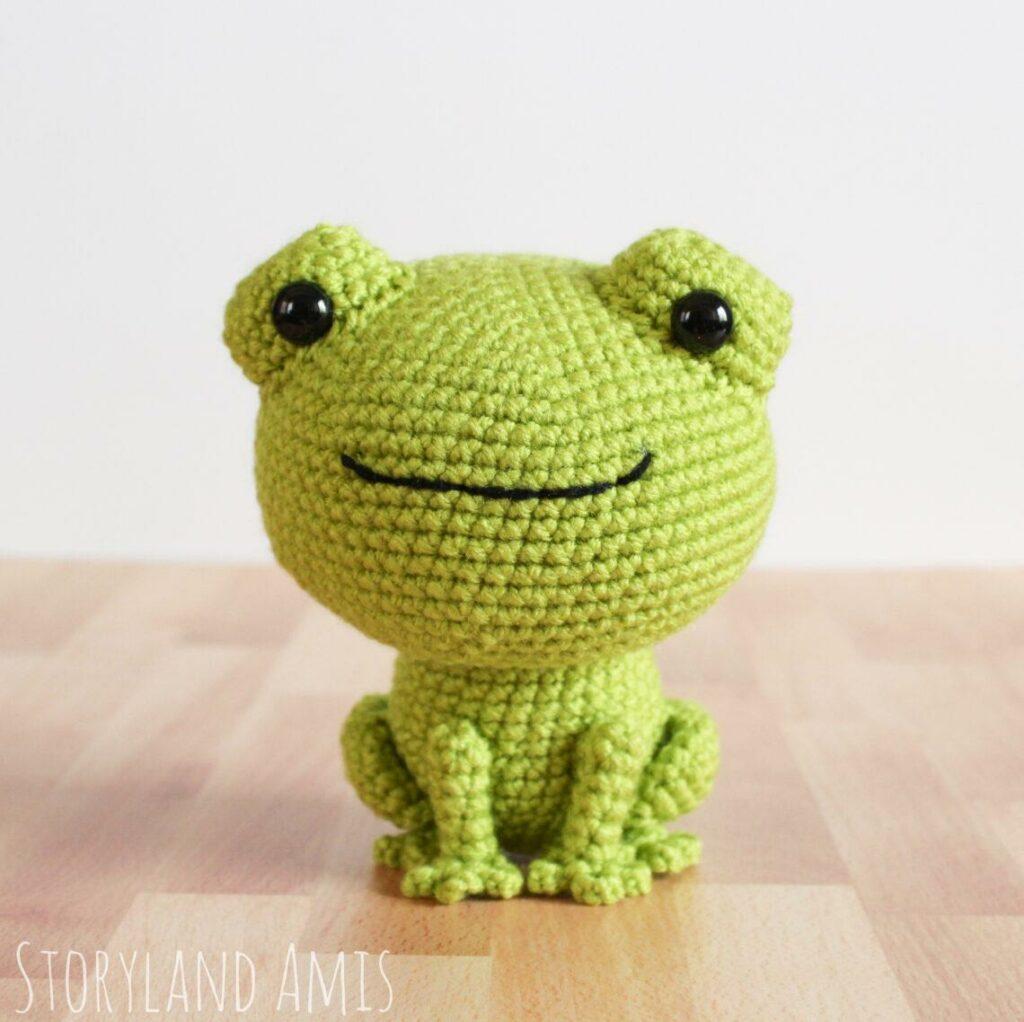
- Frog by Holly of @storyland_amis
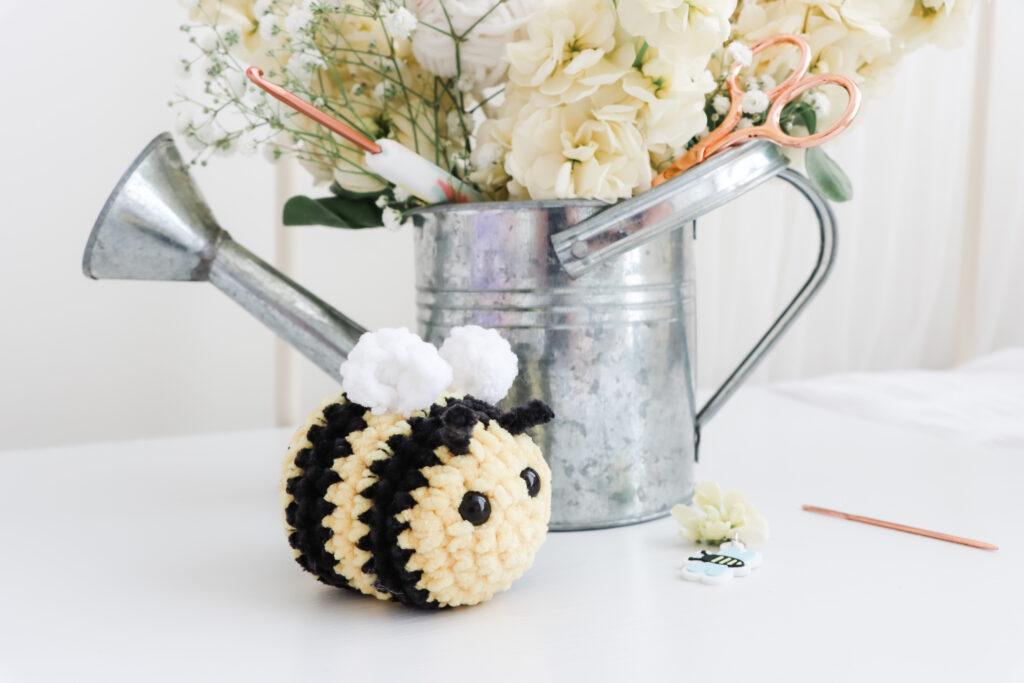
- Bee by Louise of lulathemoth
- Unicorn Lovey by Banga of YarnWave

I always love to see your makes so if you try any of my patterns or follow my stitch tutorials please tag me @bellacococrochet or use the #bellacococrochet
sarah-jayne


2 Comments
Tracy Dickerson
December 15, 2021 at 4:05 pmIs it possible to see a picture of how the tail looks?
BellaCocoTeam
December 16, 2021 at 11:03 amYou can find all the information on my blog at blog.bellacococrochet.com, if you require any further information you will need to contact the guest designer 🙂